


Spring-time vegetable soup
Spring-time vegetable soup with olive oil drizzle Serves: 8 Cook Time: 30-minutes Ingredients 2 chorizos, sliced 4 garlic cloves, crushed 4cm ginger, grated 2 spring onions, sliced 1 large leek,...

Spring-time vegetable soup with olive oil drizzle Serves: 8 Cook Time: 30-minutes Ingredients 2 chorizos, sliced 4 garlic cloves, crushed 4cm ginger, grated 2 spring onions, sliced 1 large leek,...

Homemade HummusServes: 4Cook Time: 2-minutes Ingredients 2 x 400g cans of chickpeas 3 tbsp lemon juice 2 garlic cloves, crushed * 1/2 cup olive oil Sprinkle of salt and pepper...

It’s almost our Greek Easter time and I’m excited!!! We LOVE Easter in our family and of course it’s always a food celebration. These lamb skewers or baked vegetables are...

IT’S DAY THREEEE! Recipe heaven over here haha! Who doesn't LOVE an easy weeknight bowl for dinner? And even better, who doesn't love a meal that you can prep in...

DAY TWO RECIPES! Yeeehhaaa!! Fritters are my FAVE - I genuinely could eat a hundred in a row and love it haha this recipe is such a simple, fun and...

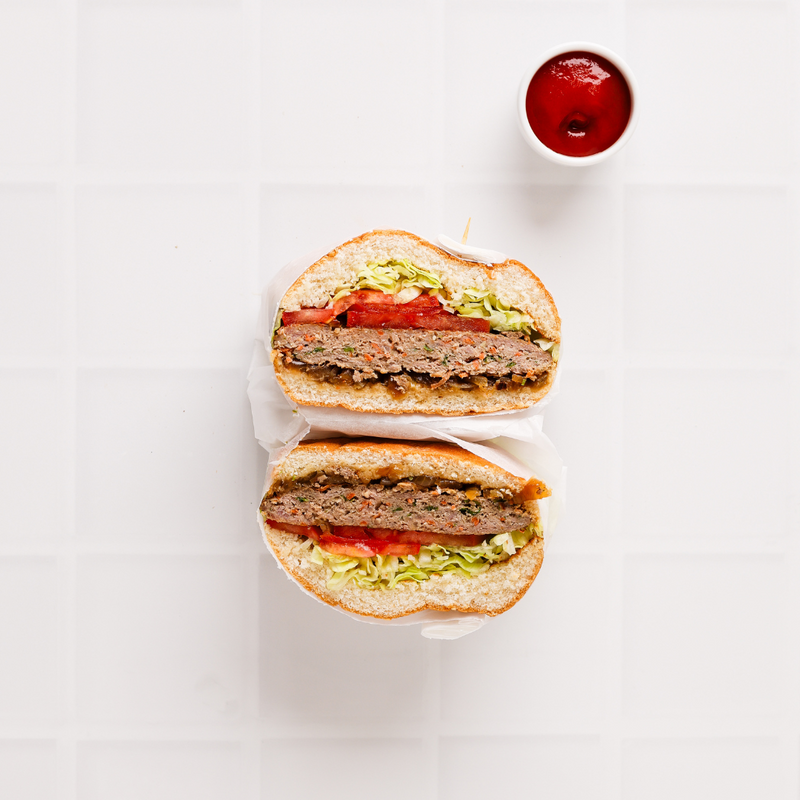
WOOHOO We’re on DAY ONE! So…who doesn't love a burger?! I absolutely love it when my family comes over for burgers, it's such a fun meal because everyone can choose...